우분투에서 ATI드라이버 설치하기.

우분투에서 ATI드라이버 설치하기.
이런게 팁이 될줄 모르겠습니다.
예전에 데비안에서 ATI드라이버 설치하기 문서를 번역했었는데.
아무리 봐도 미흡한 번역이고, 문서의 범위가 무척 넓기때문에 이번에는
그냥 간단하게 설명하려 합니다.
우선 현제 드라이버는 8.14.13 까지 나왔습니다.
여기서는 최신버젼인 8.14.13 설치하는 환경으로 설명하겠습니다.
환경:
커널을 컴파일 하지 않은 우분투 기본 커널 2.6.10-5-386 사용
ATI드라이버 사용.
1)
#apt-get instal linux-source-2.6.10
#cd /usr/src
#tar xjvf kernel-source-2.x.y.tar.bz2
#cd kernel-source-2.x.y
#cp /boot/config-2.x.y-flavour .config
#make-kpkg --append-to-version "-5-386" --revision 2.6.10-5 --config old configure
위와 같음 명령을 내린후
vi로 .config파일을 엽니다. 그리고 아래 옵션처럼 되어있는지 확인하고
되어있지 않다면 아래 옵션으로 고쳐줍니다.
CONFIG_MODULES=y
CONFIG_MODULE_UNLOAD=y
CONFIG_KMOD=y
-------------------------------------------------------------------------
CONFIG_MTRR=y
-------------------------------------------------------------------------
CONFIG_AGP=m
CONFIG_AGP_[ your chipset ]=m
CONFIG_DRM=m or y  (m 추천)
CONFIG_DRM_RADEON=m
----------------------------------------------------------------------
#CONFIG_FB  (사용하지 않음)
-------------------------------------------------------------------------
CONFIG_TMPFS=y
CONFIG_FB를 확실히 주석처리 해주어야 합니다. 사용하면 MTRR overlapping에러의
원인이 될수 있습니다.
2. 필요 패키지.
#apt-get install debhelper, kernel-package, fakeroot
만약에 gcc와 g++이 없다면 이것도 설치하시길 바랍니다. 아마 우분투는
기본적으로 컴파일러가 설치되어있지 않을겁니다.
http://xoomer.virgilio.it/flavio.stanchina/debian/fglrx-installer_8.14.13-1.dsc
http://xoomer.virgilio.it/flavio.stanchina/debian/fglrx-installer_8.14.13-1.tar.gz
위의 두파일을 다운받으세요. 다운 받은후 두파일을 /usr/src디렉토리로 카피하고.
/usr/src 디렉토리에서 다음 명령을 내리세요.
#dpkg-source -x fglrx-installer_8.14.13-1.dsc

새로 생성된 디렉토리로 (아마 fglrx-installer_8.14.13-1 일겁니다.) 이동후에 다음 명령을 내리세요.
# dpkg-buildpackage -b -rfakeroot -tc -uc -D
이부분에서 우분투는 다음과 같은 오류를 낼겁니다.
FGLRXExtensions.c:19:37: X11/extensions/xf86misc.h: No such file or
directory
FGLRXExtensions.c:20:39: X11/extensions/xf86mscstr.h: No such file or
directory
make[1]: *** [FGLRXExtensions.o] Error 1
이 문제를 해결하려면
# apt-get install libxxf86misc-dev libxxf86vm-dev
위의 두 패키지를 깔아주면 됩니다.
빌드가 제대로 수행되었다면 다음과 같은 패키지가 상위 폴더에 생성 될겁니다.
fglrx-driver_8.14.13-1_arch.deb
fglrx-driver-dev_8.14.13-1_arch.deb
fglrx-kernel-src_8.14.13-1_arch.deb
fglrx-control-qt3_8.14.13-1_arch.deb
fglrx-sources_8.14.13-1_arch.deb
그러나 우리가 필요로 하는것은
fglrx-driver_8.14.13-1_arch.deb
fglrx-kernel-src_8.14.13-1_arch.deb
이 두패키지 뿐입니다.
fglrx-control-qt3패키지는 콘트롤 패널을 인스톨하며, 듀얼모니터설정에 유용하지만
전 그냥 인스톨하지 않고 듀얼 모니터 잘 쓰고 있습니다.
두 패키지를 인스톨합니다.
#dpkg -i fglrx-driver_8.12.10-1_arch.deb
#dpkg -i fglrx-kernel-src_8.12.10-1_arch.deb
위 패키지를 인스톨한 후에 , 3D가속기능을 쓸 수 있는 커널 모듈을 빌드시켜야 합니다.
/usr/src/디렉토리로 이동한후 모듈 소스를 푸세요.
#tar xzvf fglrx-kernel-src.tar.gz
자 이제 준비가 다 됐으므로 모듈을 생성시킵시다.
3. 모듈 생성과 인스톨
#cd kernel-source-2.x.y
#fakeroot make-kpkg --append-to-version "-5-386" --added-modules fglrx modules_image
위와 같이 커널 소스 디렉토리로 이동해서 명령을 실행시키세요.
위의 명령이 수행 되었다면
/usr/src폴더에 fglrx-kernel-2.x.y_8.12.10-1+[kernelversion_arch].deb패키지가
생성되었을겁니다.
이제 설치해주면 끝납니다.
#dpkg -i fglrx-kernel-2.x.y_8.12.10-1+[kernelversion_arch].deb
modules 디렉토리를 지웁니다. 예전에 본 문서에 지워라고 적혀있던걸로 기억합니다.
rm -rf /usr/src/modules/
자 이제 모듈을 올려봅시다.
#modprobe fglrx
아마 정상적으로 올라갈겁니다.
이제
fglrxcofnig 명령으로 설정을 하시면 됩니다.
주의: fglrxconfig 명령을 내리기 전에 xorg.conf파일을 반드시 백업해두세요.
fglrxconfig는 xorg.org에 설정사항을 덮어버립니다.
이제 x서버를 재시작 시킨후(귀찮으면 그냥 재부팅시키세요)
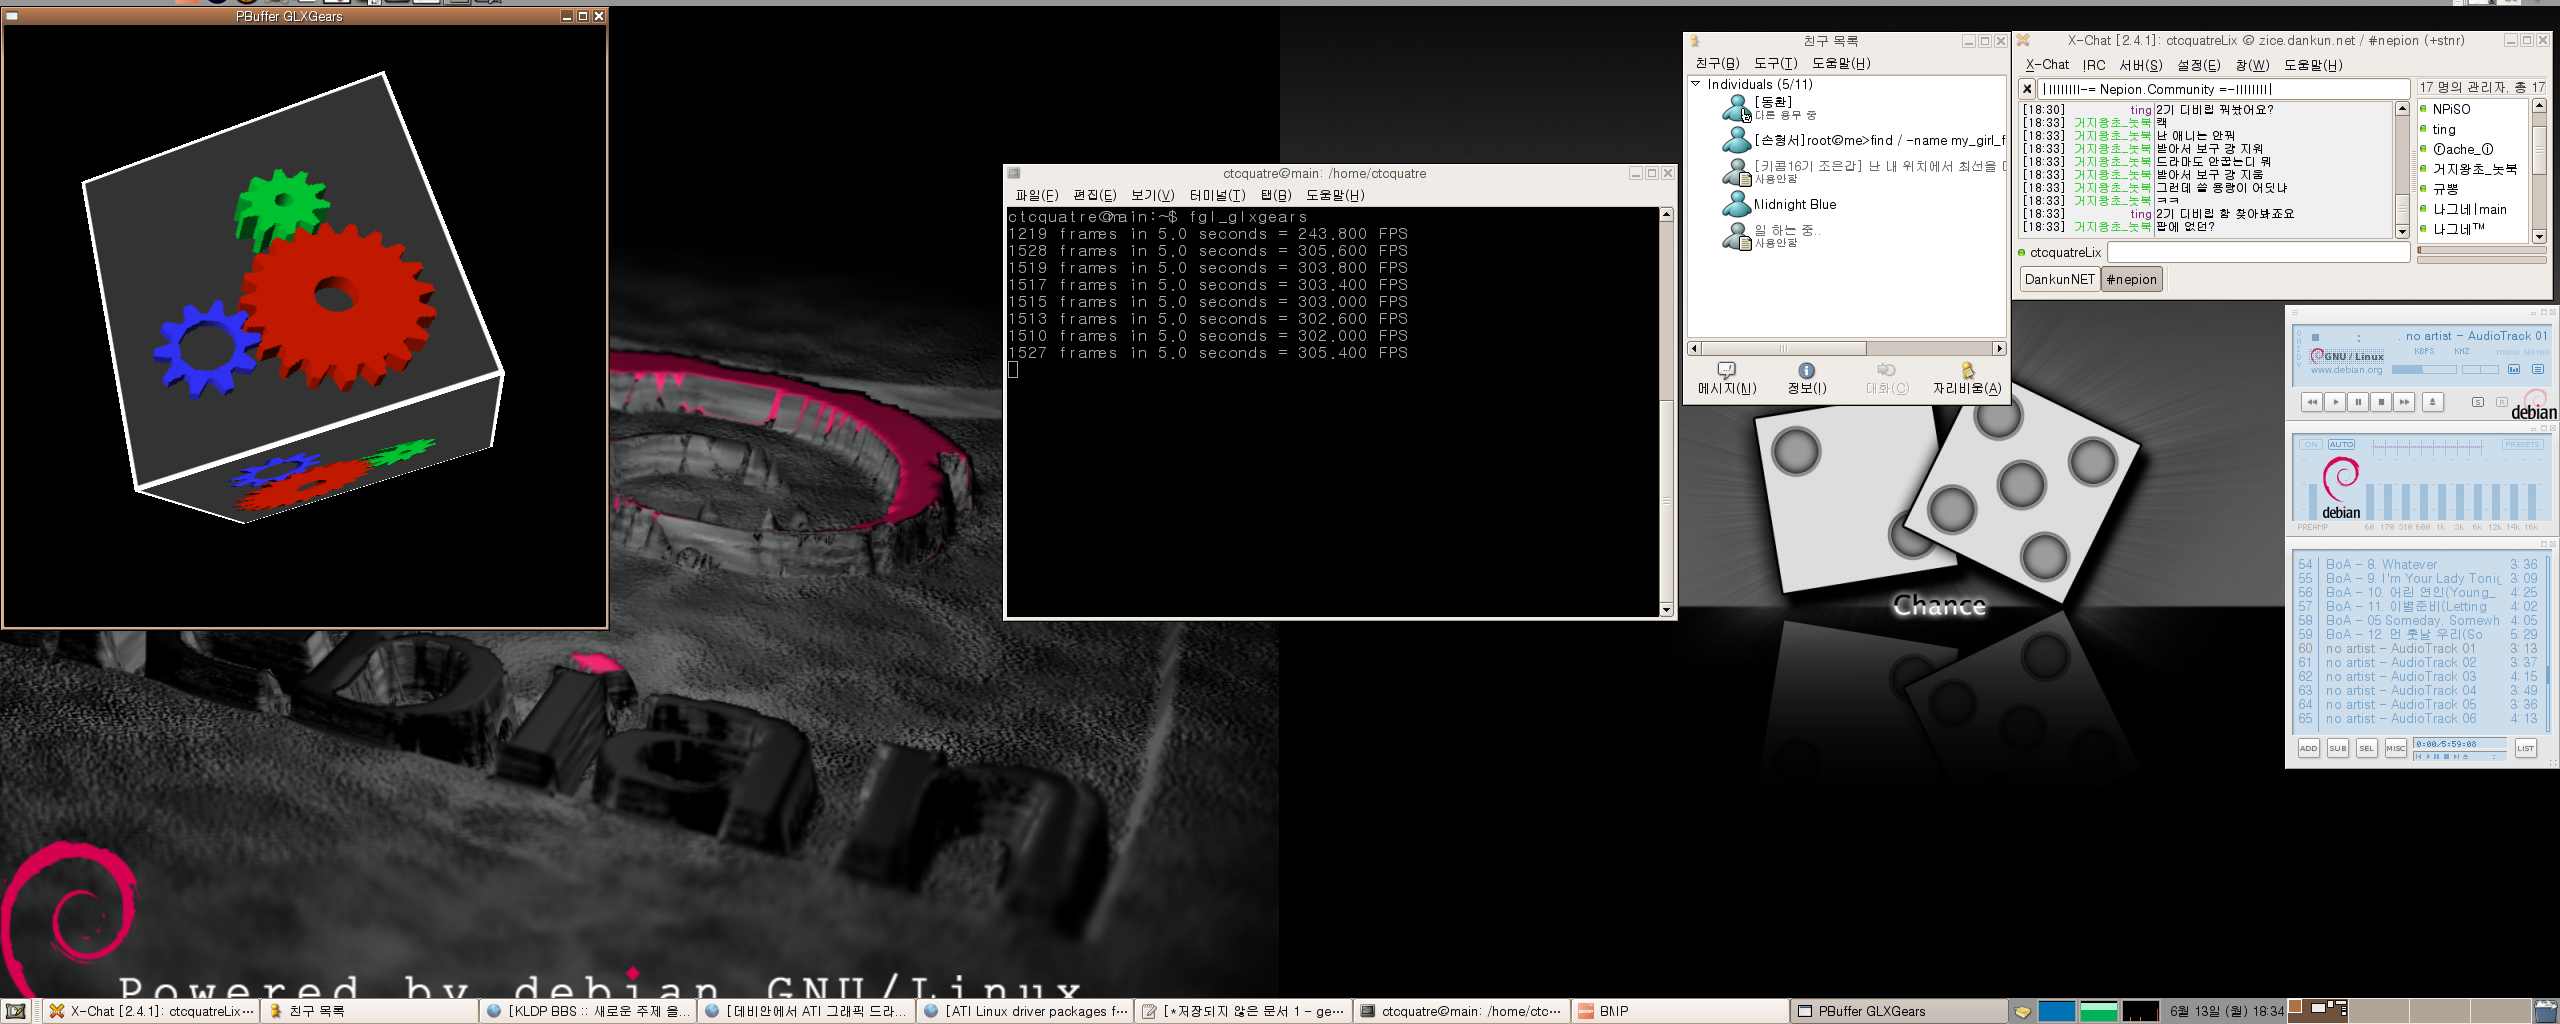
fglrxinfo 명령을 치면
RADEON 9XXX ~~ 비슷한 문구가 나올겁니다. 그럼 성공한거고
만약에
Mesa GLX Indirect 문구가 나오면 모듈이 제대로 적용되지 않는것입니다.
| 첨부 | 파일 크기 |
|---|---|
| 177.13 KB |
fglrx-kernel-2.x.y_8.12.10-1+[kernelvers
fglrx-kernel-2.x.y_8.12.10-1+[kernelversion_arch].deb 파일이 생성되지 않는데요.. 답변 좀 부탁드립니다.
달랑 그한줄로 무슨 답변을 하겠습니까. 제가 저글을 쓸당시 컴을
달랑 그한줄로 무슨 답변을 하겠습니까.
제가 저글을 쓸당시 컴을 완전히 초기화 시키고 다시 우분투 깔고
apt-get upgrade만 한후 바로 작업했습니다.
쉽고, 짧게 설명하려고 특정 상황에 종속적인 설명들은 빼고
그냥 따라만 하면 되게끔 글을 썼습니다.
아마 데비안 패키지가 생성되지 않았다면
1)
#cp /boot/config-2.x.y-flavour .config
#make-kpkg --append-to-version "-5-386" --revision 2.6.10-5 --config old configure
2)
커널 옵션 설정부분
3)
#fakeroot make-kpkg --append-to-version "-5-386" --added-modules fglrx modules_image
이렇게 세부분을 한번 다시 보시길 바랍니다.
그리고 커널소스버젼은 현제 시스템에 사용하는 커널버젼과 동일해야 합니다.
Chaos to Cosmos,
Chaos to Chaos,
Cosmos to Cosmos,
Cosmos to Chaos.
[quote][code:1]CONFIG_DRM=m or y (m
ati드라이버를 설치하실경우 반드시 커널의 drm은 꺼놔야합니다...
http://odin.prohosting.com/wedge01/gentoo-radeon-faq.html#2_kernelopts
---------------------------------------------------
야!...
댓글 달기